Copyright Ⓒ ![]()
- Offline reference clip
Once the edit is locked, you should render out an offline reference clip. This is a straight render of the entire locked cut that includes all of the effects and title animations from the NLE (Non Linear Editing: e.g. Adobe Premiere, Final Cut, etc.) application you used. It is essential to use this file as a reference to compare and check the conforming process (building a timeline identical to the editor’s) into an NLE or finishing applications like DaVinci Resolve.
- Overlay / Data Burn-in
If you are already working with the proxy files, it is quite possible that you are already working with overlay data burned in. In this case, you don’t need to do anything else. However, if there is no overlay you should at least add a source file name, source and record time code overlays on the offline reference clip. This way, it will be easy to locate any offline files or mismatching cuts. My suggestion is to keep the size small and the opacity at around 25% so as to prevent distracting the editor with the overlays.
Please see the image below.
- Overlay / Data Burn-in

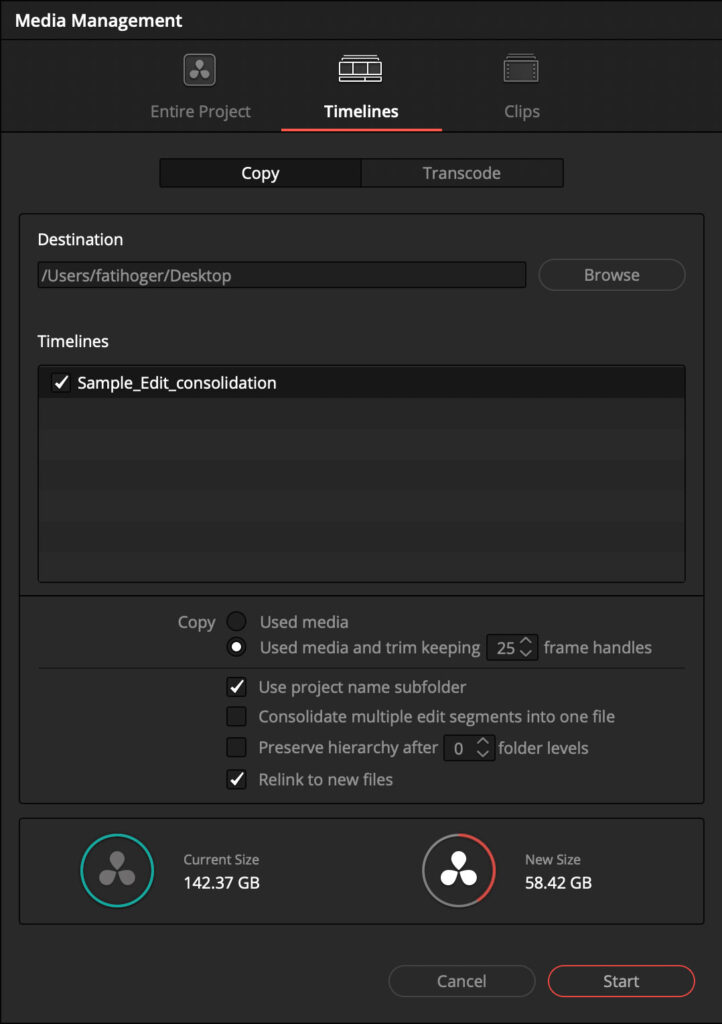
- Copy and Trim.
– Choose the “Timelines” tab and select Copy.
– Choose a location.
– Click the timeline checkbox you want to deliver.
– Check “Used media and trim keeping xx frame handles.”
– Check “Relink to new files”
Please check the image below.
- Copy and Trim.
- Transcode and Trim
– Choose the “Timelines” tab and select Transcode.
– Choose a location.
– Under the settings tab, click the timeline checkbox you want to deliver.
– Choose the video format under the Video tab which we should decide together
– Leave the Audio tab as it is.
Please check the image below.
- Transcode and Trim
![]()
- Collect files and Copy to new location
– Choose the sequence you want to consolidate.
– Click “Collect files and Copy to New Location”
– Choose the destination.
– Click “Exclude Unused Clips”!
Please check the image below.
- Collect files and Copy to new location
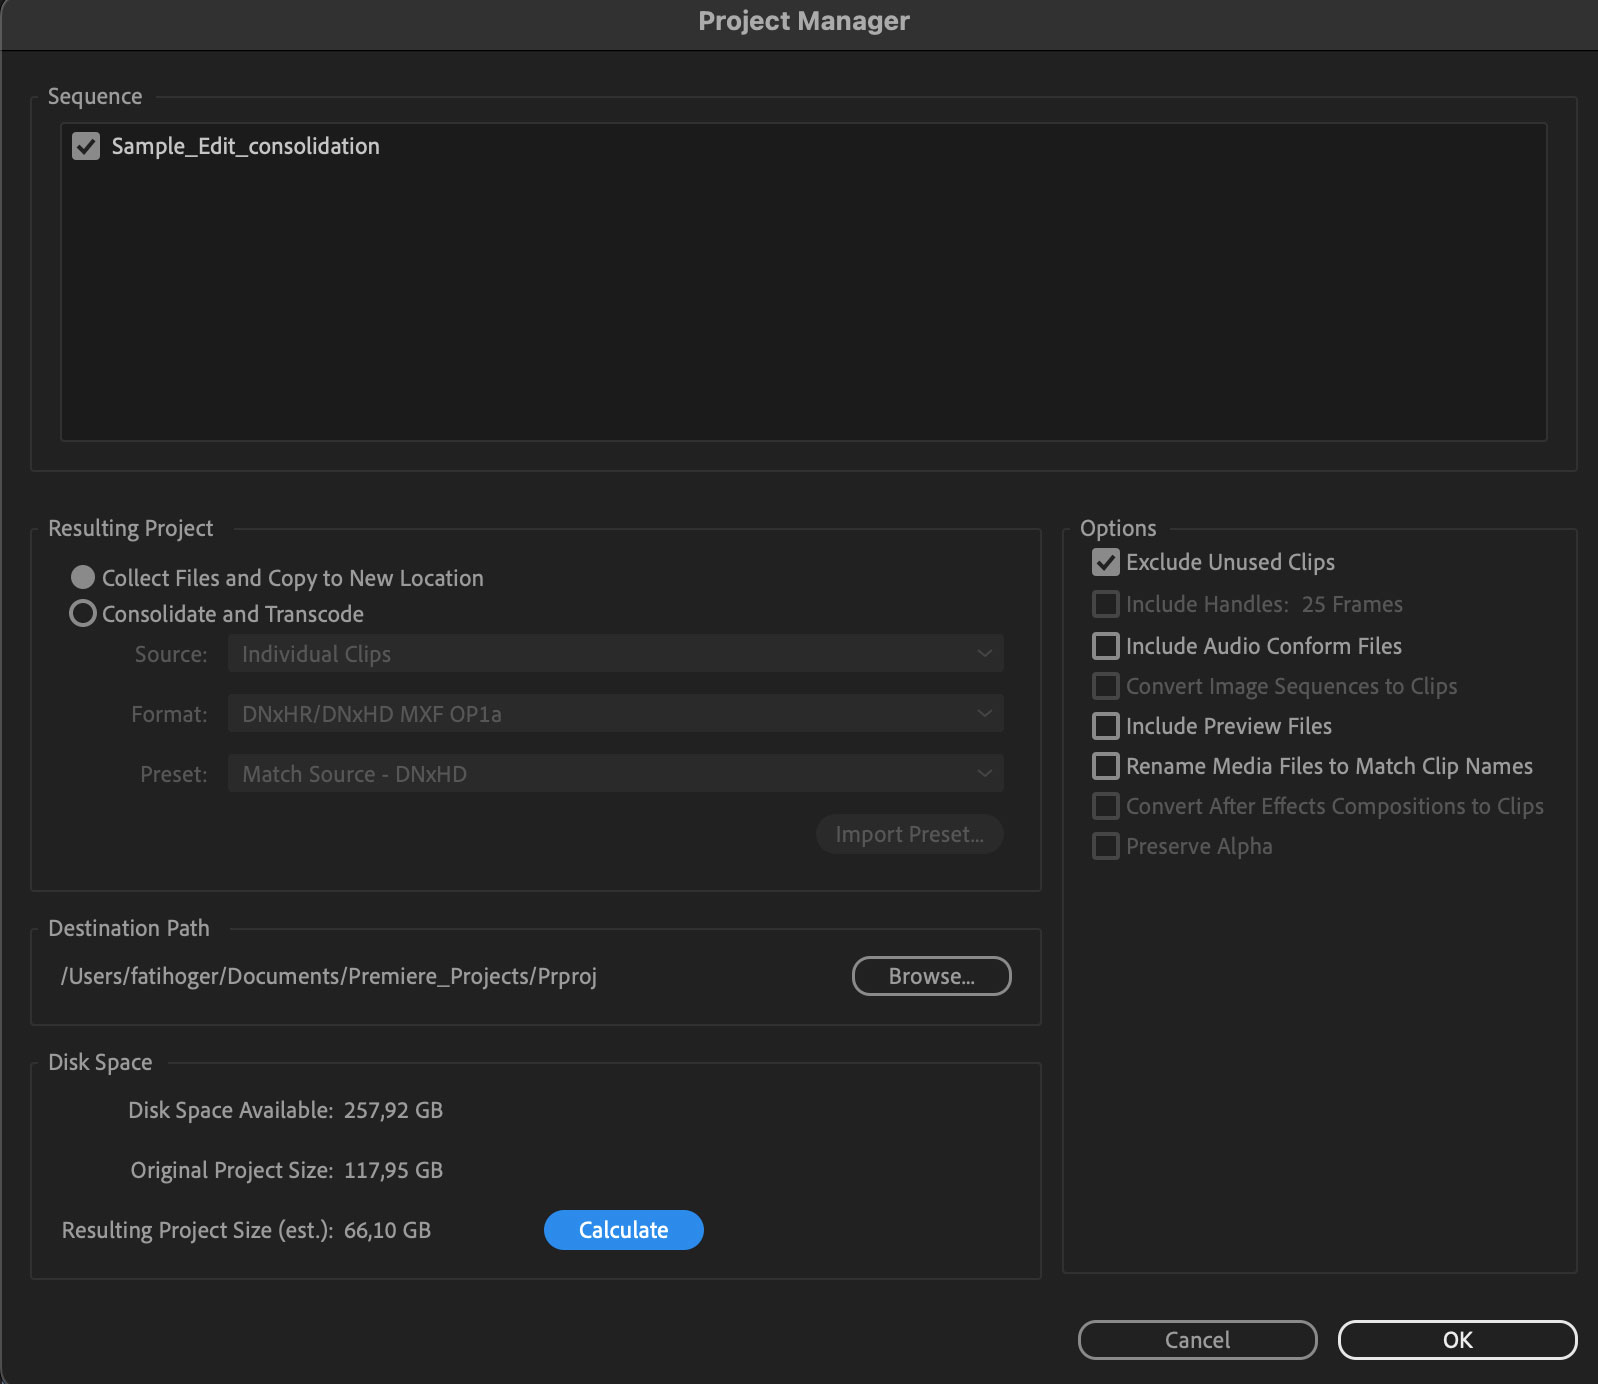
- Consolidate and Transcode
– Choose the sequence you want to consolidate.
– Click “Consolidate and Transcode”
– Source: “Individual Clips”
– Format: We will decide together based on the source media format
– Choose the destination.
– Click “Exclude Unused Clips”!
– Click and specify “Include handles: xx Frames”
Please check the image below.
- Consolidate and Transcode
![]()